The final part of this series took a few weeks longer than we originally planned. Our friend had every intention of practicing in the evenings during the week, but of course life gets in the way. Rather than rush her to the range, we ended up doing a few additional dry-fire sessions at our house, and that turned out to be a good thing.
By the last practice session, something had changed. She was moving with authority and working the charging handle like she knew exactly what she was doing. Picking up and clearing the firearm had become nearly second nature, and she could confidently load and manipulate the PCC using the snap caps we had given her. She had also practiced presentation drills, finding the optic, moving the safety between SAFE and SHOOT, and getting the firearm safely back down when she was finished. The practice had paid off.
So we watched the weather, picked a good morning, and finally headed to our private range.
Dry First, Live Second
We approached the live-fire session the same way we approached everything else in this series: slowly. Before running any drill with live ammunition, we ran through it dry first. That gave her a chance to understand the movement and sequence before adding recoil, noise, and live rounds.
The goal was not to burn through ammunition. I tend to think of a good range session like a workout, where every exercise has a purpose and every repetition is doing something useful. Our plan called for 94 rounds, progressing from very basic shooting into movement and target transitions, and finally into drills built specifically around how she intends to keep the firearm at home.
The Range Plan
- Basic Accuracy / Familiarization, 12 rounds. Start from the ready position and fire 6 controlled rounds center mass with no timer. Repeat once. This was deliberately simple because these were the first live rounds she had ever fired through the PCC.
- Single-Round Ready-Up, 10 rounds. Start from ready. On the timer beep, fire one controlled round center mass. We originally planned a 4-second par time and ran 10 repetitions.
- Two-Round Ready-Up, 20 rounds. Start from ready. On the beep, fire two controlled rounds center mass. Again, our planned par time was 4 seconds, with accuracy and control taking priority over speed. Ten repetitions. After this drill, we took a 10 to 15 minute break.
- Movement + Two Rounds, 16 rounds. Before each repetition, the RO called a direction: left, right, forward, or backward. On the start signal, she moved one step in that direction, established her shooting position, and fired two controlled rounds center mass. We planned a 5-second par time and completed eight repetitions.
- Two-Target Transition Drill, 10 rounds. Using two targets and starting from ready, she fired one round on the first target, transitioned visually to the second, and fired one round there. We planned a 6-second par time and ran five repetitions, then took another 10 to 15 minute break.
- Movement + Two Targets, 20 rounds. This combined the previous two skills. The RO called a direction, she moved one step, established her shooting position, fired two rounds on the first target, transitioned, and fired two rounds on the second. We planned a 7-second par time and completed five repetitions.
- Optic-Off / Optic-On Drill, 4 rounds. She started from ready with the optic turned off, fired two controlled shots using the sight reference available to her, activated the optic, reacquired the target, and fired two more well-aimed shots. No timer.
- Table-Start Ready Drill, 2 rounds. The firearm began safely on the table, pointed downrange, with a magazine inserted but no round in the chamber. On the start signal, she picked up the firearm, established her grip, brought it into the condition we had practiced, acquired the target, and fired two controlled rounds. Again, no timer. The emphasis was on a consistent, safe sequence.
First Live Round
The first drill was intentionally boring: two magazines of six rounds each, no timer, and no pressure. These were the first live rounds she had ever fired from the PCC.
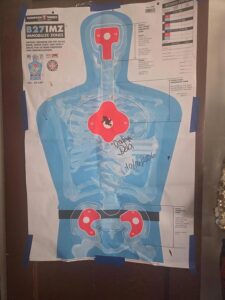
Her very first shot went directly into the bullseye.
“Holy sh*t.”
That was her reaction. Not to the sound, the recoil, the flash, or the smell of burnt powder. To the bullseye. Then she put the next eleven rounds center mass.
All of that dry practice had done exactly what we hoped it would. By the time live ammunition entered the equation, the firearm itself wasn’t unfamiliar anymore. She wasn’t trying to remember where the safety was, how the sling worked, how to shoulder it, or where the dot should appear. She could just concentrate on shooting.
The Timer Worked… Sort Of
We had planned generous par times throughout the session. Did they work? Sort of. For some drills the timer was useful, but for others it became obvious that it was adding pressure we simply didn’t need yet.
So we adjusted. Instead of being married to the timer, we sometimes went back to straightforward range commands: “Load and make ready,” followed by “Shooter ready?” Once she responded that she was ready, “Ready, go.” That was enough. The timer will still be there next time. What mattered was that she was performing the sequence safely and confidently.
Add One Problem at a Time
The movement drills were deliberately simple, just a single step. That doesn’t sound like much, but even one step can throw off shooters who have only practiced standing still. Suddenly their feet are involved, their body position changes, and all the fundamentals they thought were automatic have to survive a little disruption. In her case, they did.
We also placed two silhouette targets downrange and moved a separate civilian cutout between them throughout the session, which quietly turned the drills into a basic shoot / no-shoot exercise. We didn’t want her building the habit of simply presenting the firearm and firing at whatever was in front of her. She needed to actually look and identify what she was seeing.
Practice the Condition You Will Actually Use
The last two drills were probably the most specific to her situation.
The first was Optic Off / Optic On. People spend a lot of money on electronic optics and then practice as though the optic will always be on and waiting for them. It might not be. Her optic could realistically be off when she first accesses the firearm, so we practiced that condition instead of pretending it would never happen.
The second was the Table-Start Ready Drill, based directly on how she plans to store the firearm: optic off, magazine inserted, and no round in the chamber. This is another thing people frequently skip. If you’ve chosen a particular storage condition for a defensive firearm, it makes sense to get familiar with that condition rather than always practicing from some perfect starting position with everything already turned on and ready to go.
Was the Range Day Perfect?
No, and that’s part of training. Some of our planned par times worked and others didn’t. We changed things as we went, slowed down when we needed to, and skipped the timer when it stopped being useful. The whole session lasted roughly two hours, and she fired just under 100 rounds.
More importantly, we had a great time. It was a sunny, crisp Montana fall morning, and we shot, laughed, learned a few things, and eventually called it a day. Then we went out for breakfast.
One More Lesson
After breakfast, we went back to the house for one final lesson: cleaning the firearm. While we had the PCC apart, we also talked about the one piece of equipment that had turned out to be less than ideal, the optic.
When we originally put the PCC together, she had pulled a small RMR-style optic off one of her ARs. It worked, and judging by the targets, it certainly didn’t keep her from shooting well. But after using it for an entire morning, she realized it sat a little too low and the viewing window felt a little too small for her. That’s exactly why actually using your equipment matters.
During the cleaning session we let her look through several other optics. One immediately felt better, and she ended up purchasing an EOTECH 512. When it arrives, we’ll help her mount it, get it roughly aligned with a bore sight, and then, naturally, we’ll need another range day to zero it properly. Funny how that works.
What She Learned
 Two things really stood out to her after the whole process.
First, she was surprised by how much improvement came from only a few hours of constructive practice. She didn’t spend six months training. She spent a handful of focused sessions practicing the same fundamentals correctly, over and over, and by the time we reached the range those things were familiar enough that she could focus on shooting instead of fighting the firearm.
Second, she learned that sometimes you can’t decide whether a piece of equipment works for you until you actually use it. The original optic was functional, and she shot bullseyes with it all morning. It still wasn’t the best optic for her, and that’s an important distinction.
Back to Philosophy of Use
When this series started, our friend had asked a seemingly simple question: what firearm should I get for home defense? The answer was never going to be a particular make or model.
Part 1 was about philosophy of use. We looked at what she already owned, what she actually needed the firearm to do, and what platform fit her physically. Part 2 was about familiarity, learning the firearm and practicing with it before live ammunition ever entered the picture. Part 3 was about putting everything together.
The lesson was never that everyone should buy a PCC. The lesson was to identify your POU, your philosophy of use, and build everything else around it. Choose the firearm around the goal, and set it up around the person. Practice with it, find out what works, change what doesn’t, and then keep training.
Because buying the firearm was never the finish line. It was where the work started.